Introduction
In part one of this series you configured your OpenSaaS account, created a basic template site and connected it to your WooCommerce store. Then, in part 2, you fleshed out your template and got it to the point where you have a basic MVP (minimum viable product).
In this part of the series we’re going help you start to personalize your template site by applying a basic custom plugin.
In part 2 you personalized the site a bit by using the Admin Menu Editor Pro plugin. However, by using a custom plugin you can fine-tune some things that you would not be able to do with Menu Editor Pro.
There are a few commercially available wp-admin styling plugins that you can use to achieve some of what we’re doing here. However, there are reasons why we’re not using those in this series. Primarily, we want you to get used to the idea of using efficient code snippets for the “simple” stuff.
Many wp-admin styling plugins are code HEAVY. And in many instances you might be using just a handful of functions. By doing your best to avoid those plugins you make your tenant sites more efficient which means that you can load more of them up on a server.
In a multi-tenant environment code efficiency matters.
Goals
We will use a custom plugin to accomplish four very simple things:
- Change the term “Kadence” to “Acme” – for the purposes of this series we’ll use ACME as our brand name.
- Remove some unnecessary wp-admin dashboard widgets
- Add new custom dashboard widgets
- Load up style sheets for both wp-admin and the front-end
Get The Sample Plugin
You can download the sample plugin from Github
Once downloaded, you need to open the .zip and remote the folder named open-saas-tutorial-final-files.
If you do not remove this folder, the plugin will throw an error.
Once you’ve removed that folder you can upload it to your template site just like you would any other plugin.
As soon as you activate the plugin you will see the following changes:
wp-admin Dashboard Changes
Originally, the wp-admin dashboard looked like this:
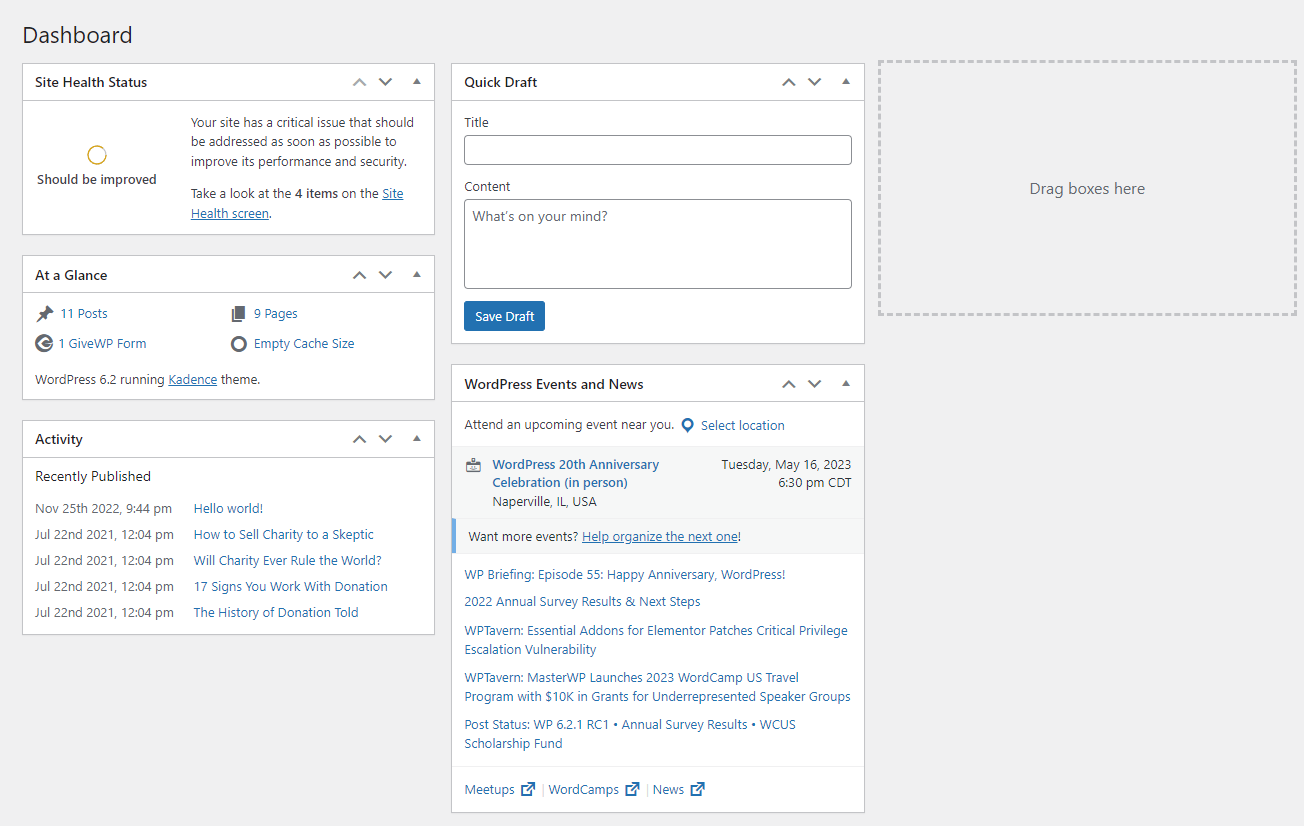
It will now look something like this:
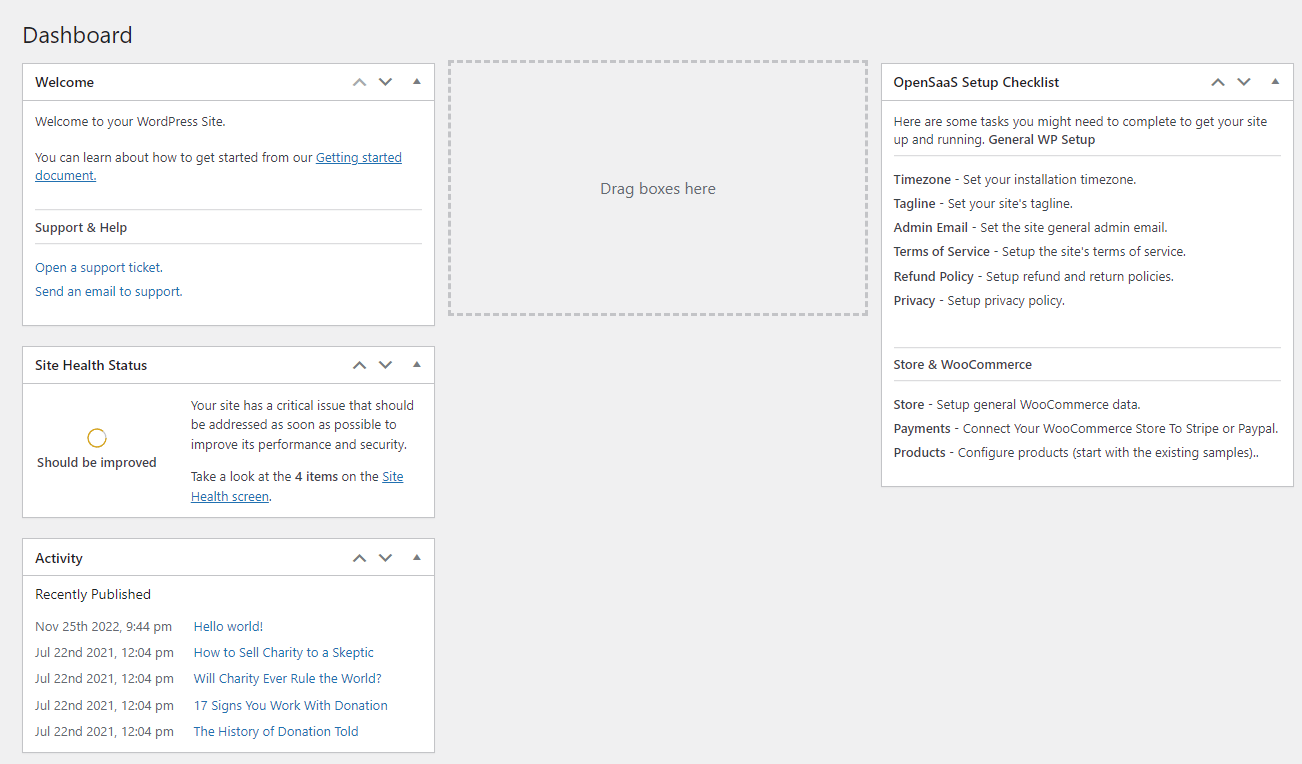
Do you notice the changes?
A few of the original widgets disappeared. And there are two new ones: WELCOME and OPENSAAS SETUP CHECKLIST.
Terminology Changes
Most places where you say the term “Kadence” will be replaced with the term “OpenSaaS”.
Personalizing Things
I’m sure you don’t want your customers to see the words “OpenSaaS” on their dashboard. So let’s start removing those by modifying the plugin.
Note: We’re not going to tell you which text editor to use or how to open a php file for editing – we’re assuming you have those basic skills.
Locate the wp-tenant-custom-functions.php file in the root folder of the custom plugin and open it in your text editor.
Search for the function translate_words_array.
In that function you will see two key-value pairs as part of a PHP array. Replace the
'Kadence' => 'OpenSaaS' entry with
'Kadence' => 'Acme'.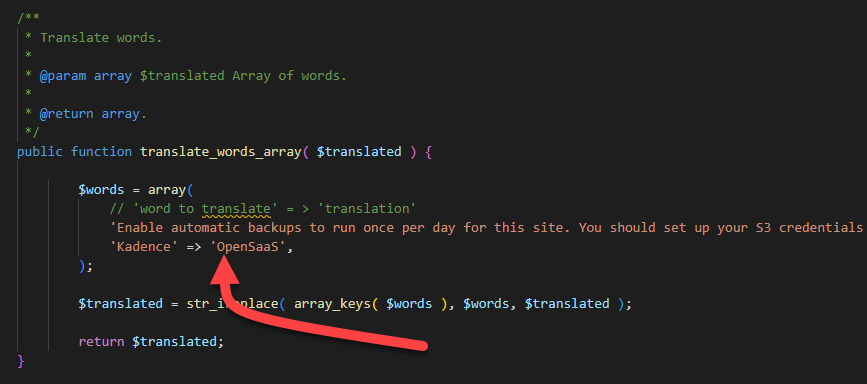
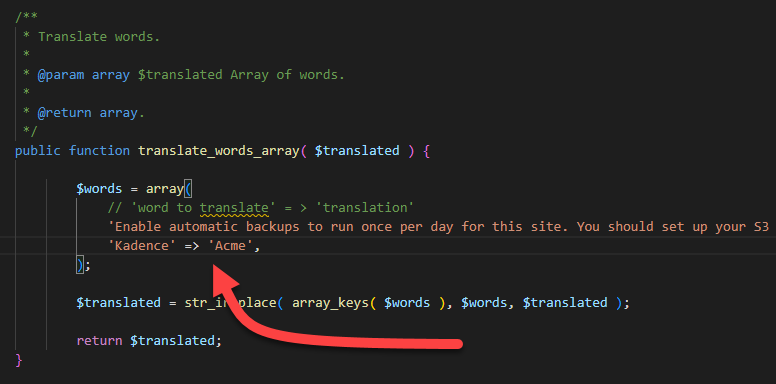
If you want to replace additional terms, you just add a new line under the “Kadence” line and follow the pattern on the “Kadence” line. Your lines must all END with a comma!
What about the “OpenSaaS” terms in the new dashboad widgets?
Let’s replace those as well!
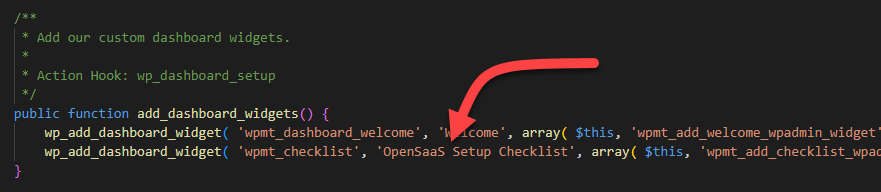
Search for the function add_dashboard_widgets.
In the second line of that function, you’ll see the term ‘OpenSaaS Setup Checklist’ – This is the title of the dashboard widget. Just replace it with your own ‘Acme Setup Checklist’ or something similar.
Save & Upload
Save your changes. Then, create a .zip file with all the plugin files (including the one with your changes). Upload it as a new plugin and replace the existing one.
Your screen should now show something similar to the following:
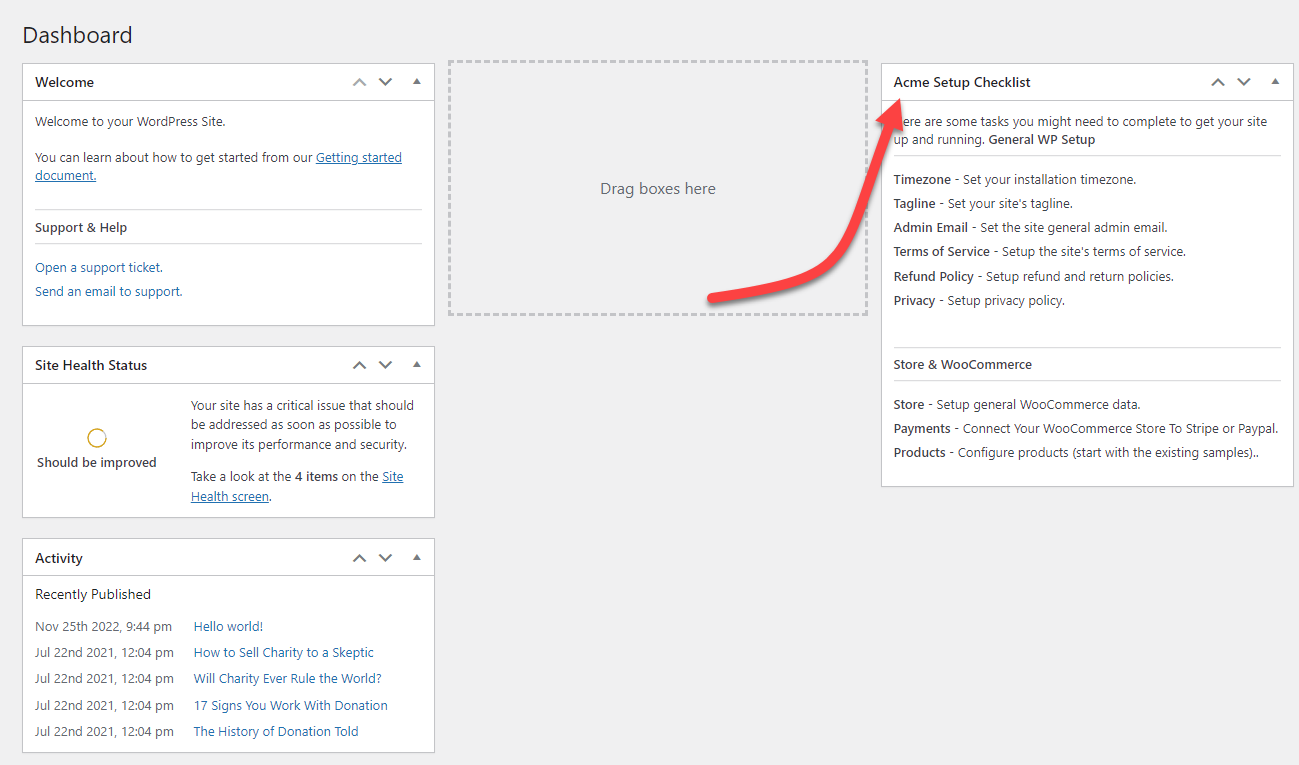
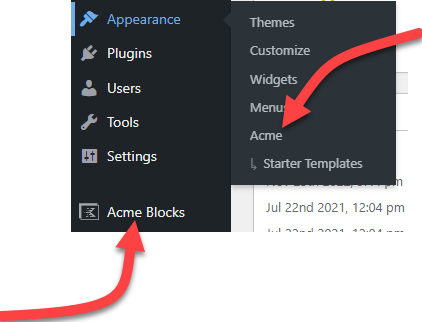
And the “OpenSaaS” and “Kadence” terms in the menu are gone:
Exercise #1
By this time you’re probably familiar with the structure of the plugin. We bet you can figure out how to change the contents of the two custom dashboard widgets. So maybe go ahead and do that now.
Hint: The contents are located in the functions wpmt_add_welcome_wpadmin_widget and wpmt_add_checklist_wpadmin_widget.
Conditionally Remove Dashboard Widgets
As the admin you probably still want to see the HEALTH and ACTIVITY widgets. But you probably don’t want your tenants/customers see those, right?
So, let’s remove them only for your tenants/customers.
In Part 2 of this series you set up a new customer role and login. The customer role is named opensaas_customer_admin.
We will modify the custom plugin to remove the dashboard widgets – but only if the logged in user has the ‘opensaas_customer_admin‘ role.
To handle this, first search for the function remove_dashboard_widgets.
Now, add in the following code to the bottom of the function (just before the closing curly brace):
		if( is_user_logged_in() ) { // check if there is a logged in user
			$user = wp_get_current_user(); // getting & setting the current user
			$roles = ( array ) $user->roles; // obtaining the role - force to array because a user can technically have more than one role (standard wp only assigns a single role though.)

			if ( in_array( 'opensaas_customer_admin', $roles, true ) ) {
				remove_meta_box( 'dashboard_site_health', 'dashboard', 'normal' ); // Site Health.
				remove_meta_box( 'dashboard_activity', 'dashboard', 'normal' ); // Site Health.
			}
		}
This code checks to see if a user is logged in and, if they are, checks to see if one of their roles is ‘opensaas_customer_admin‘. If it is, the code removes the two wp-admin widgets.
The modified function should look similar to the following:

Save your file, zip up the folder and upload as a plugin.
Test your changes by going through the store checkout flow to create a new customer/tenant site. Once logged in as the customer, you should not see the two widgets. But when you’re logged in as the admin you’ll still see them.
Exercise #2: Other Minor Tweaks
By now you’re probably really familiar with the custom plugin. So for this exercise we’ll give you the code for the desired outcome – you just need to make sure you apply it correctly.
Tweak #1: Replace Welcome Message
If you look at the bottom of the wp-admin area you’ll see a notice ‘Thank you for creating with WordPress’. Maybe you want to replace that with “Copyright Acme 2023” or something similar.
To do this you must first add the following code block to the constructor function:
/* Add our notice in admin footer */
add_filter( 'admin_footer_text', array( $this, 'admin_footer_text' ), 10, 1 );
Then add the following new function to the file:
/**
 * Add our own notice to the admin footer area.
 *
 * @since 1.0.0
 *
 * Filter Hook: admin_footer_text
 *
 * @param string $msg The existing message.
 *
 * @return string
 */
public function admin_footer_text( $msg ) {

    // Bail if we're not far enough into the initialization process to get the screen id.
    if ( ! function_exists( 'get_current_screen' ) ) {
        return $msg;
    }

    // Message to show defaults to the original incoming message string.
    $return = 'Copyright (c) Acme 2023';


    return $return;

}
Tweak #2: Replace Howdy
If you look at the upper right of wp-admin you’ll see a greeting that starts with “howdy”. Many folks find that a bit too casual so let’s replace it with the word ‘Welcome’ instead.
Add the following line in the constructor:
/* Replace Howdy */
add_filter( 'admin_bar_menu', array( $this, 'replace_wordpress_howdy' ), 25 );
Then add the following new function to the file:
/**
 * Replace 'howdy' in the top bar
 *
 * @since 1.0.0
 *
 * Filter Hook: admin_bar_menu
 *
 * @param object $wp_admin_bar A reference to the admin bar.
 *
 * @return string
 */
function replace_wordpress_howdy( $wp_admin_bar ) {
	$my_account = $wp_admin_bar->get_node('my-account');
	$newtext = str_replace( 'Howdy,', 'Welcome,', $my_account->title );
	$wp_admin_bar->add_node( array(
		'id' => 'my-account',
		'title' => $newtext,
	) );
}
Wrapup
Ok, so this article was a little code heavy. If you’re not a developer it might have been a little bit uncomfortable to get through this. But think about what you’ve accomplished:
- You’ve applied tweaks that would normally require an inefficient and heavy-duty plugin. This goes straight to your bottom line because it allows you to run more sites on the same server.
- If you’re not a developer you now have something you can hand over to one to further develop – and you probably saved yourself a few hundred our thousands in costs by doing the simple stuff yourself.
Going forward this custom plugin will likely be used for the following:
- Apply database changes during upgrades
- Detect the first time a site is up and running and do some initialization things
- Add a function to do some custom-onboarding steps
- etc.
In part 4, we’ll do a little more work with this plugin before moving on:
- Learn where and how to set basic styles
- Optionally add code that keeps users away from the wp-admin dashboard
Note to professional devs: you’ll notice we didn’t use composer. This is a deliberate decision – the audience for this series of articles are not professional developers. Plus, for simple stuff, we don’t see the need to complicate things with a build pipeline and tons of additional code.
Request a Demo
Want to see OpenSaas.io in action? Request a demo - just pick a time from our calendar.